A week ago I was running a workshop (online!) about git and GitLab for colleagues at work. After a whole year of teaching online with Zoom, I thought I was prepared for everything that could go wrong. However… I didn’t expect Zoom to fail me now.
Zoom failing me (or me being super confident…)
I hadn’t taught that particular workshop for more than a year and I have prepared over the days before some diagrams to account for the whiteboard I had in the room last time I taught it. We were starting earlier than usual, so I left everything ready the night before, laptop, browser with the tabs open, terminal with the teaching setup, etc. At 9’00 am I started introducing myself and the workshop to the participants - all good so far (everyone could see and hear me). Then the teaching started.
Let me make a parenthesis and explain first my setup. I’ve found very useful the Zoom feature that allows sharing only a portion of the screen when teaching with a single screen. I’ve normally got the terminal, vs code, browser or whatever I need to show on my left half of the desktop. That allows me to keep my notes, the chat window, list of participants, etc on the right half.
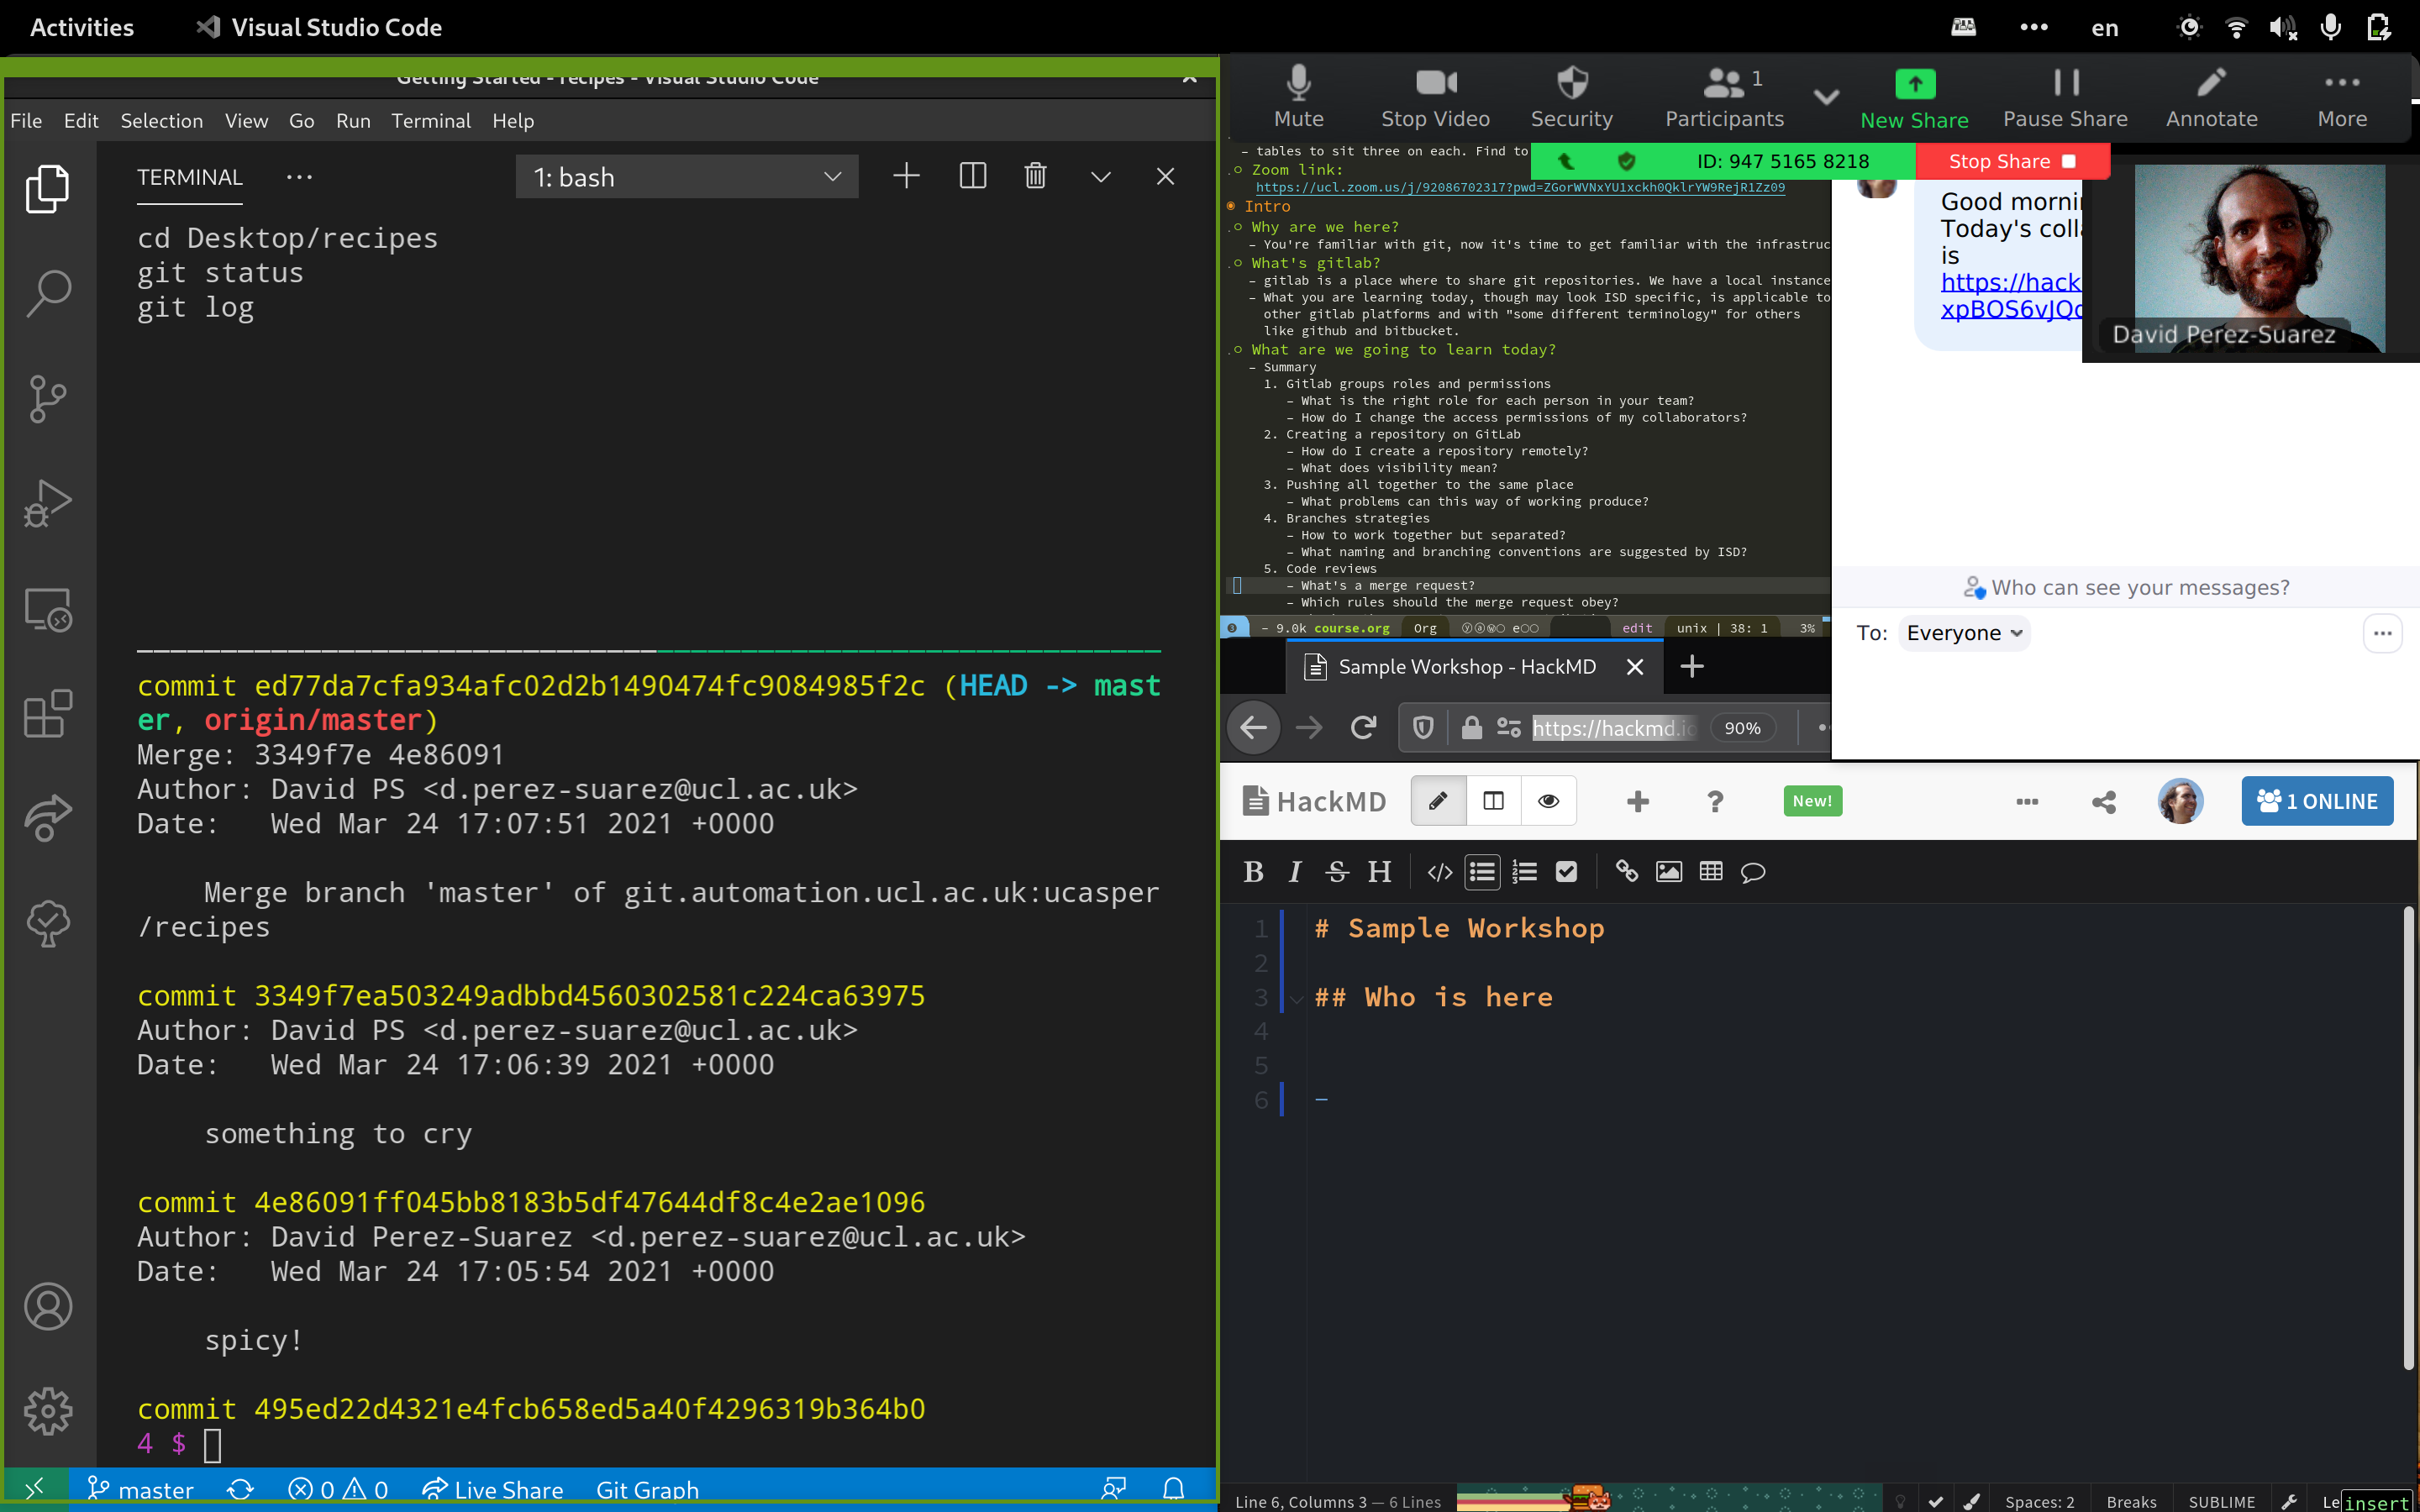
When shared your screen like this, it’s suggested to tell your “viewers” to exit from the full-screen mode that Zoom starts automatically by default when someone shares their screen. If they don’t do so they’ll have my content in the middle of their screen and one-quarter of the screen free on each side to code-along. Not very useful, right? I’d recommend you disable that default behaviour.
Ok, back to my class. All was ready, I was full of energy and enthusiasm to try
this fun workshop. But, when I shared my screen, I heard one saying “I don’t see
anything”, and another “me neither”… Hum… That’s strange, Zoom is telling me
I’m sharing. Ok, let’s try to get out of the call and back again. Same thing.
Ok, then, let’s try to share the full screen (and keep my notes in my head).
Nada. Then one of the participants said, “maybe you can try restarting the
computer”. Ha! I did run an update recently, maybe that’s why. I restarted the
computer, reconnect to the call… and I still can’t share. It was already 9’25
and we hadn’t started, so I decided to give it a go with my personal laptop. I
connect, share the screen and yeah! people can see my screen!!! But all my
files, diagrams, notes, etc. were on the other computer. Thankfully I got all my
files in a single place that I could easily scp across, also most of the
software I needed to be installed there too. In the end, we started almost 40 minutes
late but we managed to cover the important bits we needed. Not as interactively
as I had prepared, but people were happy at the end.
This last week I was having more teaching to do, and this time with less margin for problems as the workshop was two full days from 9 to 5. I knew we were going to use Zoom again, so I had to fix my problem before the teaching started. I browsed a bit to see whether people were having the same problem I had but I couldn’t find anything. I believe it may be related to the update to the newest version of gnome (40!) or the latest update of Zoom. I haven’t had the time to do much testing.
Entering OBS
I had used OBS (Open Broadcast Software) twice before, once for recording a tutorial for the translations of the Carpentries and another time for a talk about an autogradding tool (submitty). That last time had been more than a year ago and I had some problems. However, I had heard that the new version made some things easier! So, I decided to give it a go. Here I’m explaining the setup I used, how I “embedded” into my flow while teaching, what went well and what things didn’t work that well.
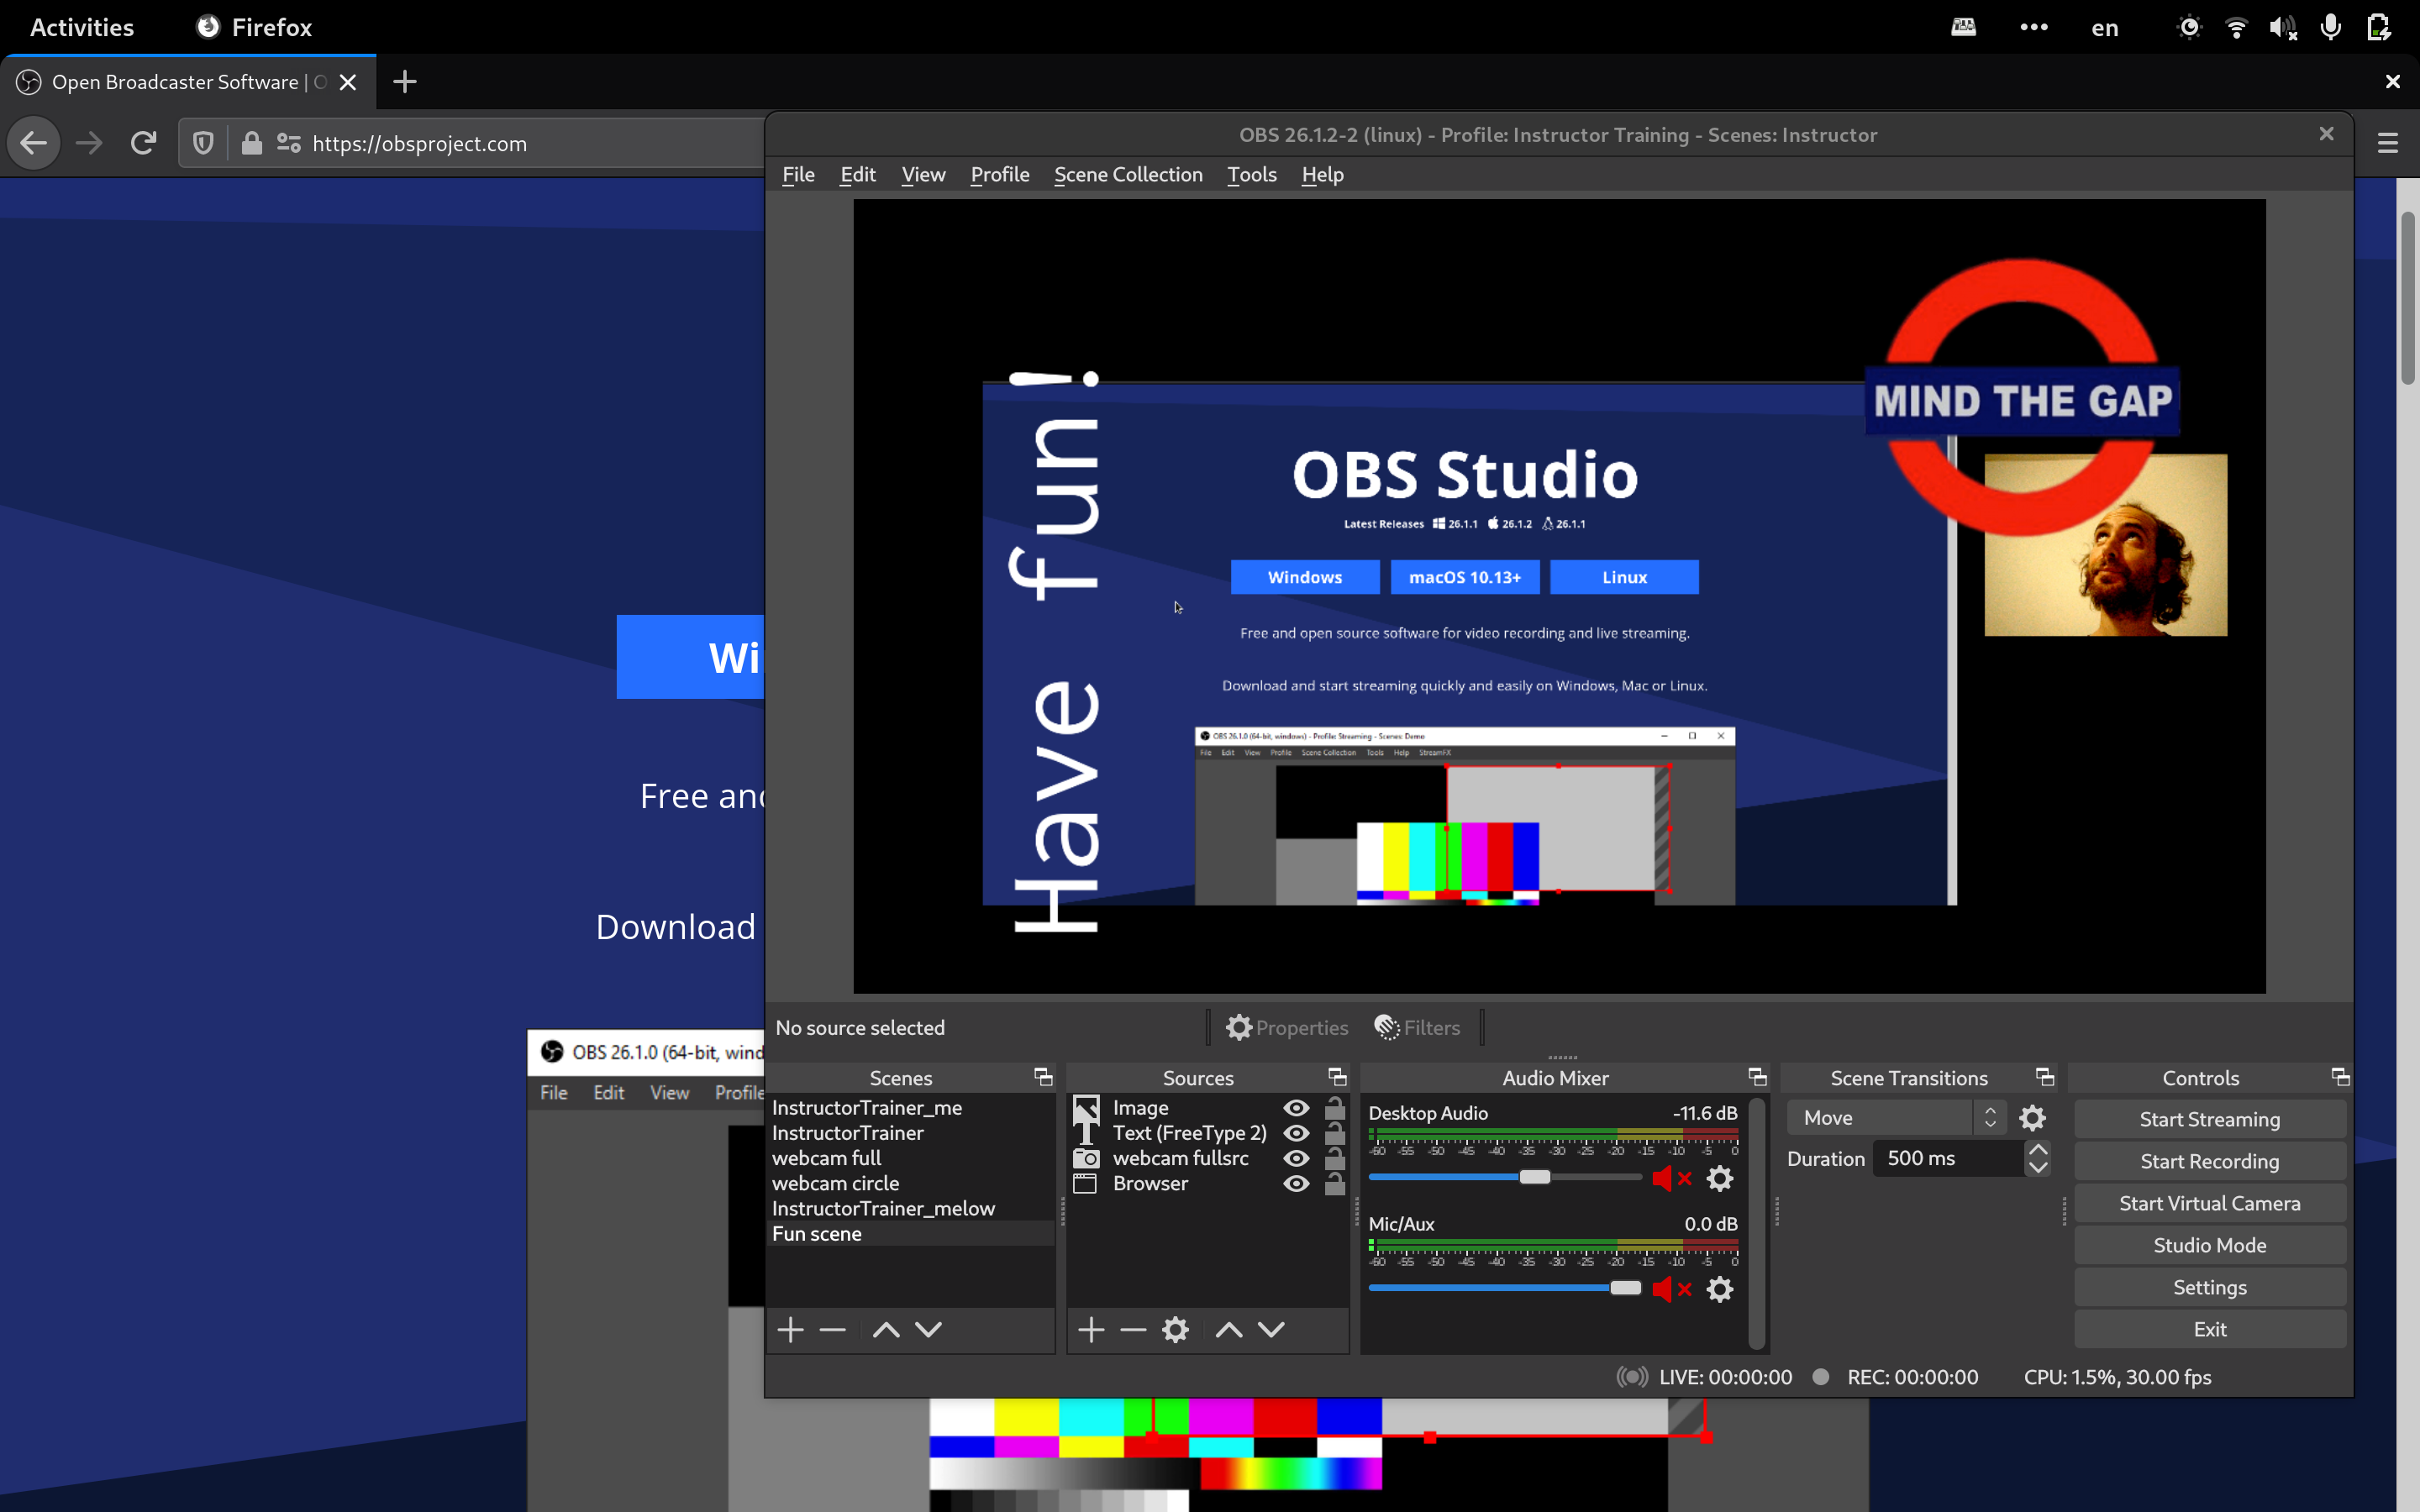
OBS is very neat! You can have multiple scenes, and switch between them with hotkeys from almost anywhere on your desktop. A scene is composed of one or many sources. A source could be your webcam, a static image, text, a window capture, etc. Each of these sources can be placed wherever you want in the scene. For example, you can get something like the image below, where I’ve got a scene (bottom left box) named Fun scene, with four sources (box next to “scene”): an image, some overlay text, a browser (shown below of OBS Studio) and my webcam.
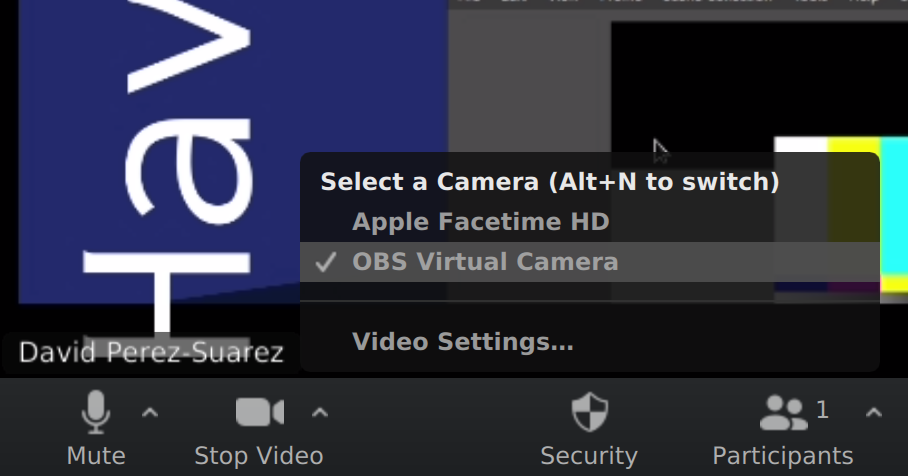
If you want to stream that through Zoom/MS Teams/Blackboard/Jitsi or your favourite video conference tool, OBS provide now an easy way to tell these programs that you have a new webcam and that the content of that webcam is what you see on OBS. That’s done by clicking first on the “Start Virtual Camera” you can see on the set of buttons on the right-hand side, and then selecting that new webcam on your video conference tool. The image below shows where you can select that on Zoom.
If for any reason you don’t see the camera there, close the video conference program and open it again. At least that worked for me in Zoom.
I don’t know about other operative systems or Linux flavours, but for me, if OBS is using the webcam other programs can’t get the feed from the webcam at the same time. So, in Zoom, for example, I either have OBS camera or nothing, even if I got the option to choose the webcam.
This is a problem if I want to switch between them while I’m in a call as I can only show what I’ve got in OBS. Or… is it really a problem? You can have multiple scenes in OBS, remember? So, we could have one with only the webcam, and another with the scene where I’m presenting/sharing the stuff I want.
In this screenshot, I’ve got the studio mode enabled (button above the settings on the bottom left corner). With it, you get two views, a preview on the left and a program on the right. The view on the right would be what you are streaming, the one on the left is the one you can transition to. The buttons between these views let you choose which transition you want to use between one scene and another. There are a few options where to choose from, and a few more can be installed with additional plugins.
Great! The first problem solved! Now we don’t need to switch cameras in Zoom.
However, there’s another problem we will face. In Zoom (and similarly in other programs), when one shares the screen that gets “spotlighted” for everyone. This is, it becomes the main view for all, even when other people are talking. However, if we are telling these programs that we are using a “webcam”, then they are going to treat it as such and the main view will be switching from presenter to others if they talk. Fortunately, in Zoom, you can “spotlight” a particular presenter. This was one of the problems I had last year when I gave a talk using this because MS Teams didn’t allow me (and still doesn’t) to share my screen, we recorded the presentation for others that couldn’t attend it live… only to discover then that the recording had me and my slides in a corner.
At that time I didn’t think about that, but it seems MS Teams now has that option. I don’t know whether that works for the recordings too.
For the workshop I had this week I prepared three scenes:
- one with me (as the webcam)
- another sharing my browser (where I had my slides, the shared document, etc.)
- another with the browser and myself in a corner
The last one was to give a more personal view of the slides, so people could see my expressions and gestures when I was talking and not only the slides.
I set some hotkeys in OBS to transition between scenes. To do so, click on settings (bottom right corner), select the hotkeys section, and find the name of the scenes you want. Each of them has a “switch to scene” setting that you can input your keybindings for it. I used:
- ctrl+alt+m for the one with the presentation and myself
- ctrl+alt+n for the one with only the presentation and nothing else
- ctrl+alt+, for just me (the key next to m)
With that, I got a good mnemonic that was also with three keys next to each other in a meaningful order (n for presentation; m for both, ; for me).
From my side, this worked very well! I’ve got the transitions working well through the teaching and I was happy with myself. However, it was still not perfect! And thankfully, I’ve got a lot of feedback from the participants on this training session.
On the first day one of them wrote on the feedback:
Very minor bit of feedback but in the morning some of David’s face was often covered by the Zoom banner. Might be better to have it at the top of the slides instead of the bottom.
Of course, I hadn’t accounted for that! I had placed myself in the bottom right corer of the screen and many video conference tools have the obsession to place menus in top of the stream (and though they “disappear” after a while they come back again if your mouse passes by and you need to wait again a bit for it to disappear).
This was an easy fix! select the scene with me in the bottom corner and move the source to the top. Checked that the slides didn’t have anything important on that side and all sorted. (Read below how to make sure you are not hiding any text on your slides)
At the end of the workshop I received some more feedback:
When Evgenij (the other instructor) shared the screen I could use a side-by-side gallery of participants + shared screen focus (and annotation was available). When David used OBS these Zoom tools weren’t available, which worked less well for my setup.
This is the problem I mentioned above, Zoom is not seeing a screen share, but a webcam. Then we need to spotlight it if we want to keep it visible for everyone even if someone else talks. Though I don’t have a solution about annotating the presentation by the participants (and I saw a good use for it in this workshop!) I have, however, a solution about seeing the other participants at the same time. This is by enabling the dual monitors setting on Zoom. However, as the name says you need to have two monitors for Zoom to be able to work in this mode. I’ve found the following:
- There are some ways to create “virtual” screens on Linux [1], [2], [3], but haven’t tested them. I doubt they’ll work as I’m using Wayland.
- If you start Zoom and a call with two monitors and then disconnect one, Zoom doesn’t change behaviour. That’s good, that means I could trick Zoom to believe there is another screen.
-
So, if when I connect only a cable/dongle to my laptop, then set
echo on > /sys/kernel/debug/dri/0/HDMI-A-1/forceas root (thank ArchWiki), and on the display settings, select a new display and enable the toggle for it. When I start a call on Zoom, it starts with the two screens!
The next piece of feedback I got was:
OBS also blurred the quality for me
This is a bit trickier. I don’t know exactly where that’s happening, on OBS settings or Zoom. Let’s see the options I’ve found:
-
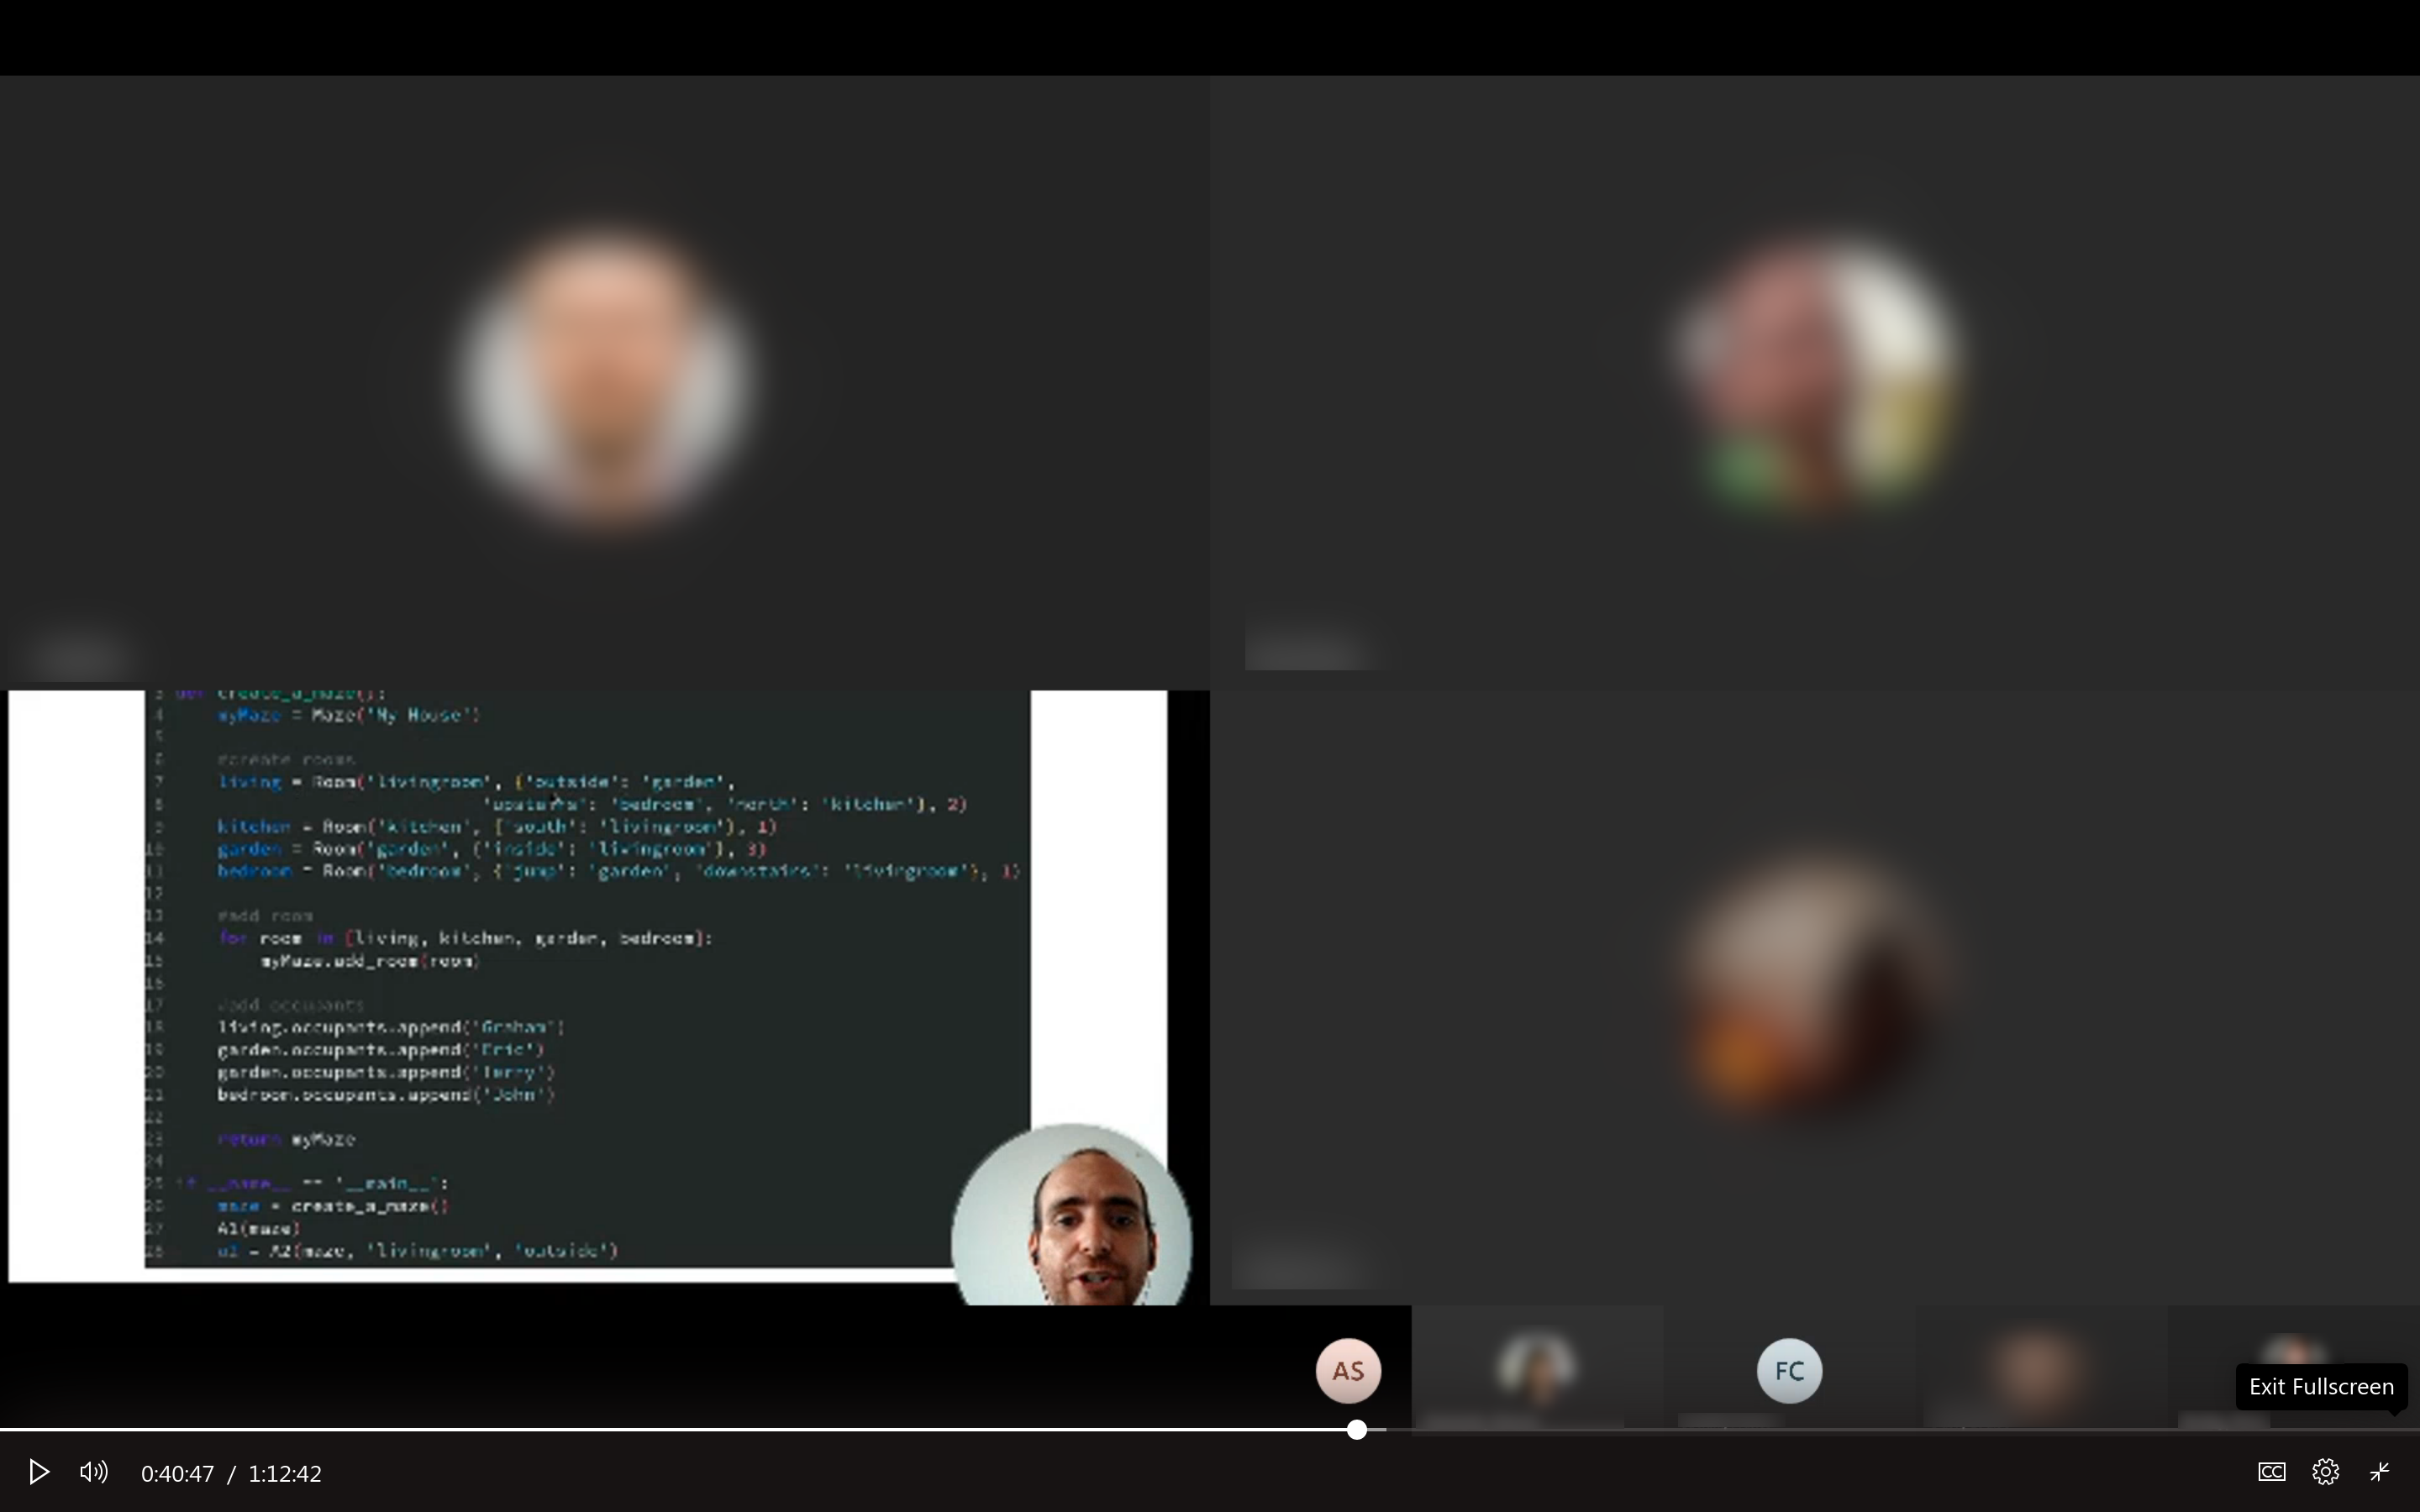
OBS offers some pre-configured profiles depending you are using it for streaming, recording or virtual camera. On each of these, you can select the output resolution. I’ve played a bit with the video output settings and checked the outputs with Zoom on my side, and connected to a call from the browser. On my side, it seems OK, but when comparing with what’s obtained on the other side is really bad. This is how it looks!
There are more settings on OBS, but I believe there may be something on the Zoom side.
-
Zoom has also some settings for the webcam that I believe might also affect the quality of what’s sent: checks for original ratio, HD, touch up my appearance, and, under the advanced settings, optimise video quality with de-noise. Changing any of these parameters doesn’t show any improvement compared with what I showed above. However, when trying to connect to the call from a different computer - either using the web or desktop app - I could see a large improvement! The desktop app is slightly better.
I believe the “touch up my appearance” was selected during the workshop and that might have been what produced some of the blurs on the participants’ side. Now I wonder how many students from this year might think I’m way younger! Whenever we meet again in person people will think I’ve aged super quick because Zoom is hiding all my wrinkles!
Anyway, I should keep testing these quality parameters. Maybe recording the calls and checking that output. Doing these tests I’ve noticed that the web client besides showing a reduced quality, it also shows a delay that varies from 2-3 seconds when selecting text on a website, to up to 10 seconds if showing a video.
Let’s now look at some neat things I used on my OBS setup that may be helpful for others:
Webcam in a circle
I don’t know exactly why, but I’ve found it more “appealing” to have my head in a circle than in a square. Maybe because it leaves more space for what I’m presenting removing all these useless corners. In any case, this is what you need to do (based on the [How to get a circular webcam in OBS Studio][obs-circle] by Gael LEVEL):
- We need to create a mask. A mask is a grayscale image that
indicates the opacity of what we want to show. Therefore we want to create a
black image the same size as our webcam and draw a white circle in it. I
used gimp for that. If your webcam has a resolution of 1280x720 pixels
then you can get my mask. Otherwise, follow the steps below:
- Find the right size of your webcam. One way to do so is using the resolution tool at the webcamtest website
- Create a new image with these dimensions and fill the image with black.
- Create a circle with the same height as the background in the centre and fill it white.
- Export that image as a png.
- Create a new scene (name it for example
webcam).- In that scene add a new Video Capture Device source.
- If the webcam source video is larger than your “screen”, then you can click the right button, see the “transform” menu, and select “fit to screen”.
- rename the source with something meaningful, e.g.,
webcam src
- Let’s now create a new scene (name it:
webcam full),- As a source for that scene, we will choose a scene,
webcam. - Yes! it seems that now we have two scenes that are equal, but this will be useful later.
- As a source for that scene, we will choose a scene,
- Let’s now create a scene with us full screen but in a circle, let’s name it
webcam circle- We add as a source the
webcamscene as we did before.
- We add as a source the
- Now, on the
webcam circlescene (not in the source!) we click with the right button and select filters. In the new window that appears we add a new “Image mask/Blend” effect filter. You can name it as you like.- In the filter options select:
- Type: Alpha Mask (Colour Channel)
- Path: the path to your mask file created above.
- Colour:
#ffffff(white) - Opacity: 100.
- In the filter options select:
- Now you can include that scene
webcam circleas a source to the scene where you are sharing your browser/slides/desktop program/etc…
changing scenes with a nice move transition
If you’ve followed up the names from the steps above for the source and the scenes, then you won’t have many troubles in this step. Good luck if you haven’t.
The move transition plugin produces very neat transitions between scenes when these scenes contain the same sources but they may have different sizes, orientations or are in different locations. Check the “Move Transition - Install/Set Up - OBS” video by Optomod to see how it works.
The installation steps depend on your operative system and Linux flavour. For ArchLinux there’s a package for it at the Arch User repository.
Once installed, you can open the “move” settings under the “scene transitions” column. The first block of settings asks how you want the plugin to find out when two sources are “compatible”. I’ve got the three options selected (but the middle one - “numbers removed from end” is not required with the steps from above. You’ve got a bunch of other options to configure in these settings, play with them.
Now, using the studio mode, you can preview the transitions by clicking on move in the transitions menu shown between the two previews.
define transitions between scenes
A very useful plugin I used was the obs transition matrix. This “Transition Matrix OBS Guide” explains well in detail how to use it. In short, it allows you to define which transition you want to use when moving from one scene to another. So, you can go from the full webcam to the presentation and webcam with the move transition, but from the presentation and webcam to the presentation only with a fade.
set up slides
Finally, the last “trick” of today is not to do with OBS, but with google slides. If you are preparing a set of slides and you want to see whether your head is going to cover some bits, then you can create a colourful square/circle on the master slide positioned where your “head” is going to appear. This will make it easier for you to clearly distinguish that space across all the slides. When you have finished, you can go back to edit the master slides and remove the square you set.
And that’s all! Congratulations if you’ve got this far! Feel free to ask me anything about this or let me know you’ve found something wrong. Please, let me know if this has been helpful to you ;)
