Sadly, strikes are becoming too frequent in the last years (though seeing the bright side I enjoy meeting university colleagues in the picket lines that I don’t have the chance otherwise).
One of our rights is that we don’t need to inform our employer (or any one) our intentions of taking strike action before we do it, only after we have done it. That’s a way to avoid that the university reschedule things knowing before hand that you are not going to be working, reducing, therefore, the impact of the strike action.
I, and most of the people I know, set an out of office auto-replies on our email during the strike period. So, when we get emails, they get a nice message back from us telling them that we are on strike and use that opportunity to tell them why we do so. Making that some kind of digital picket line.
However, the default mechanism for out-of-office auto-replies has two problems:
-
The out-of-office email are only sent once to the sender during the period of time booked. So, if you set a 3-day period when you are taking strike action and the same person emails you everyday, that “sender” will only receive one auto-reply. This makes sense when you go for holidays and you say in your email when you will be back.
-
At least on MS systems, all the platforms (calendar, teams, etc…) will show the dates that you are set out-of-office.
These two problems might me think about a work around to email back to every email I get from the same sender (they are giving me more work) and to don’t disclose the time I’m going to be on strike.
My first approach was to set the out of office manually at the end of the day for the next day. This solve partially both problems, if someone emails me one email per day they get one auto response and they only become aware I’m not available for a meeting just on the day I’m taking the strike action.
However, it requires me every day to log into the system and enable it (when I may know how many days I’m taking action).
Automation to the rescue!
There’s a tool that comes with the full Office365 that allows you to create workflows that could work for this. The tool is call power automate, and you can access through the candy-box icon in the top left corner of any of the office365 pages. With this tool I’ve created a workflow that does the following, checks the date of each email I’ve received, if the dates matches with any of the dates in a spreadsheet, then it will send a reply (with a message I’ve also set in the spreadsheet).
Let’s see how to do it.
First thing we will do is to create a spreadsheet on one drive. That spreadsheet will contain a table with two columns: date and message (as shown in Figure 1).
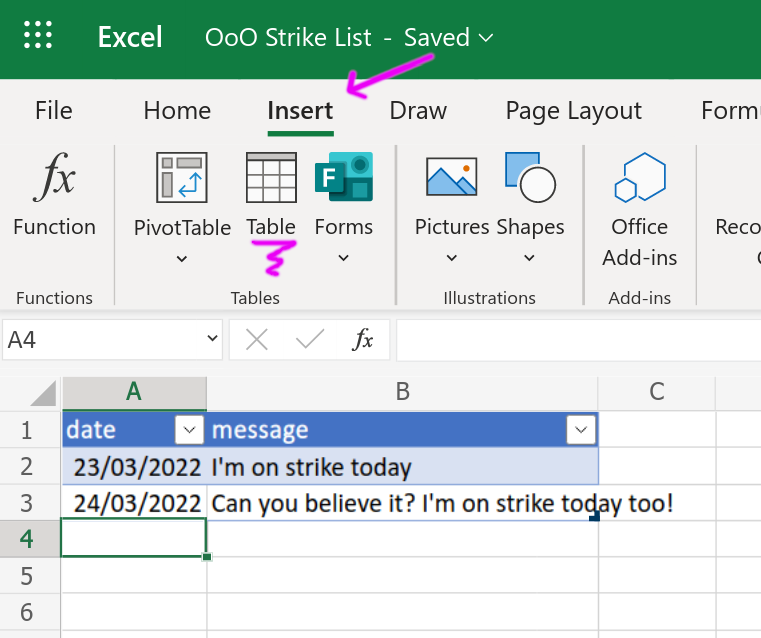
Figure 1.
To create it as a table, select the columns, go to the insert menu and click on table. Be as original as you> want on the messages column. As Excel is not as good as to write long text, I suggest we write it somewhere else and then copy&paste it in the right cell. Otherwise, if we want to create a new line on an excel cell press alt+enter.
Once we’ve got the spreadsheet ready, we can proceed to create the power automate flow.
Open power automate from the candy-box menu and select the create button as shown in the Figure 2. If the tool doesn’t appear in that list, click on the “All apps” button and search it on the list shown.
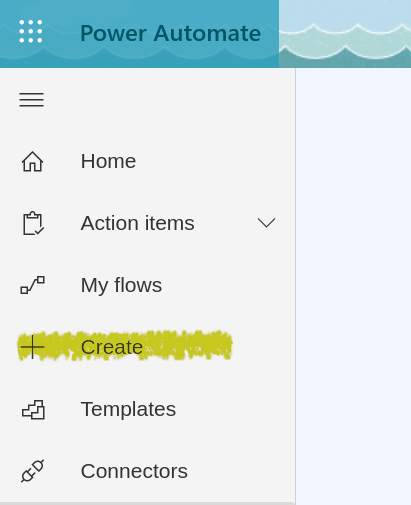
Figure 2.
We are going to start from a blank automated cloud flow (Figure 3).
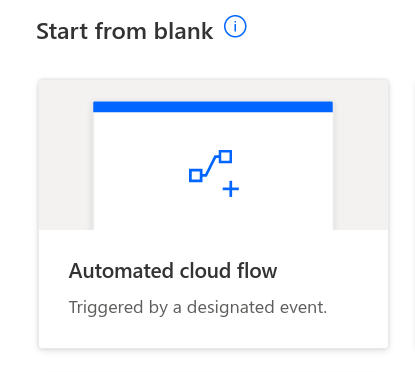
Figure 3.
Then we have to provide a name to our flow and its trigger. The name is only important for us to differentiate this from other flows we may create. Let’s call it “OoO during Strikes”. The trigger is the action that will kick the flow, in this case it’s the arrival of a new email. Type “email arrives” and the list will be filtered. We want to choose “When a new email arrives (V3)” as shown in the Figure 4.
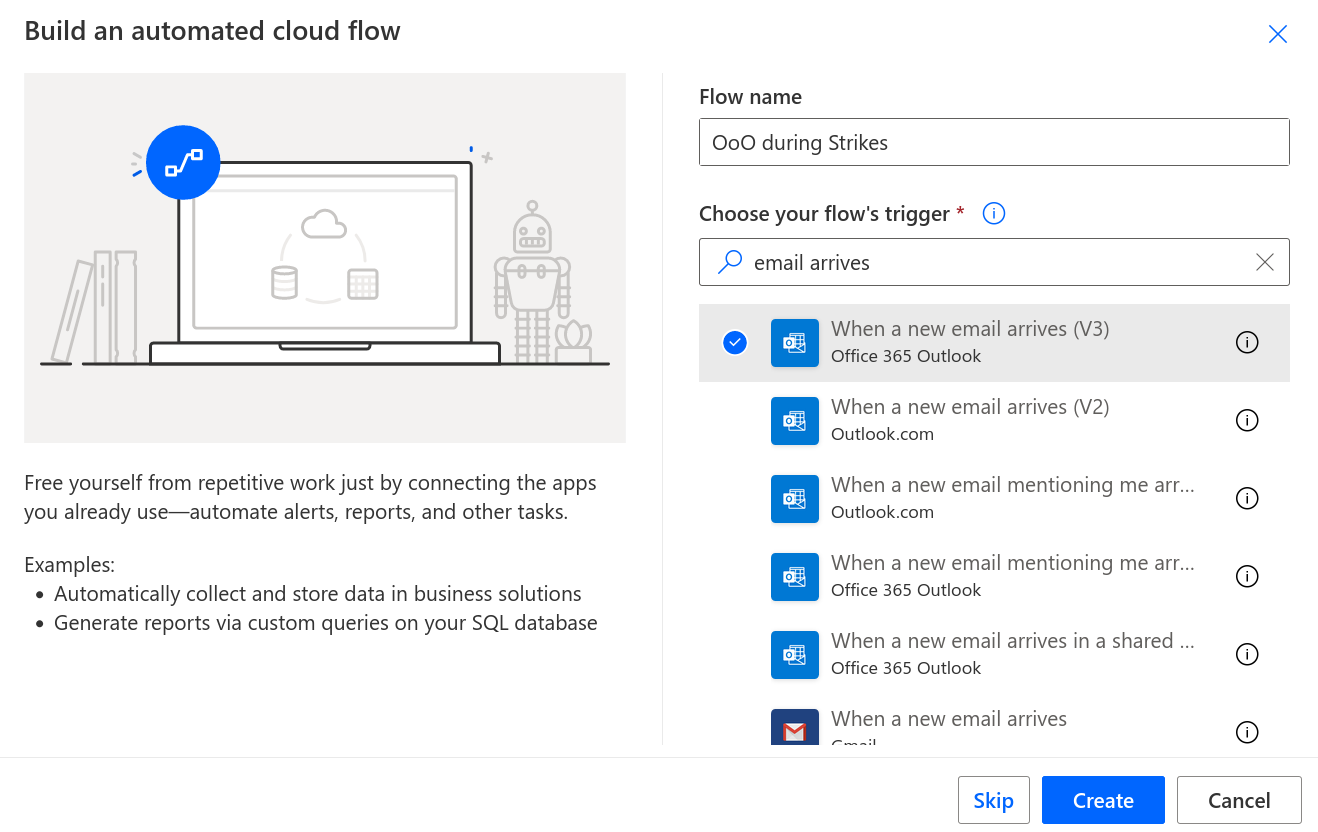
Figure 4.
We click create and we have the start of our flow created.
This trigger allows us to choose which folder to track for emails arriving and some other options to filter such as the sender, to who was sent (e.g., if you want to only reply the ones that included you - or any other address - in the To or CC field, etc.). For now, we will only leave it as it comes by default.
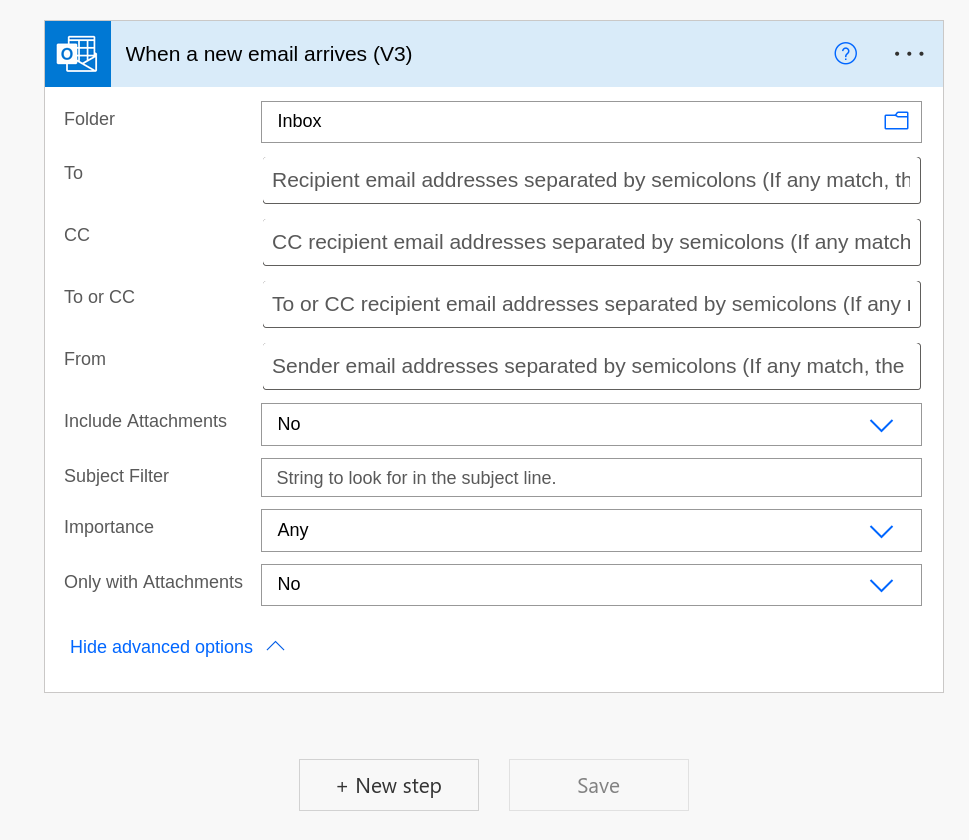
Figure 5.
And click at the bottom to create a new step.
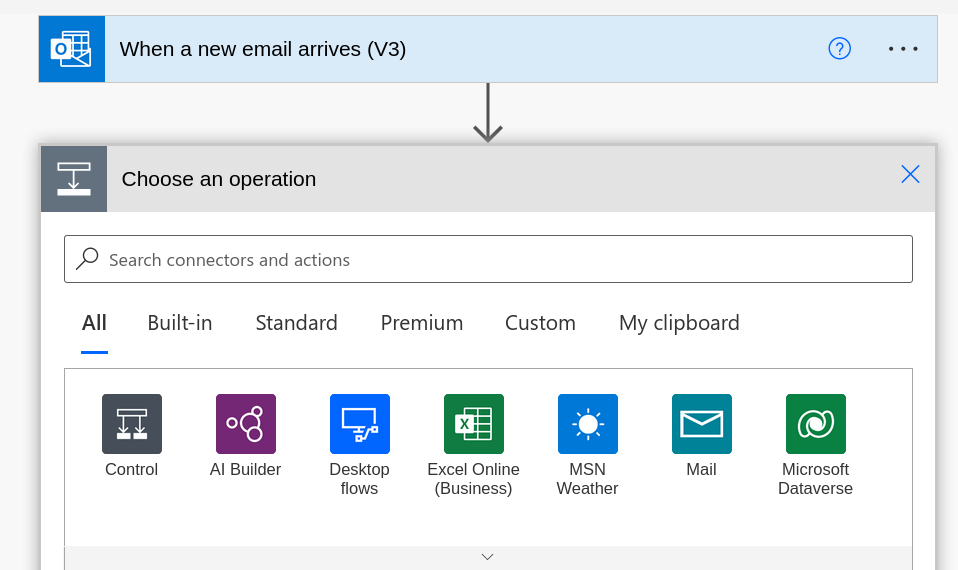
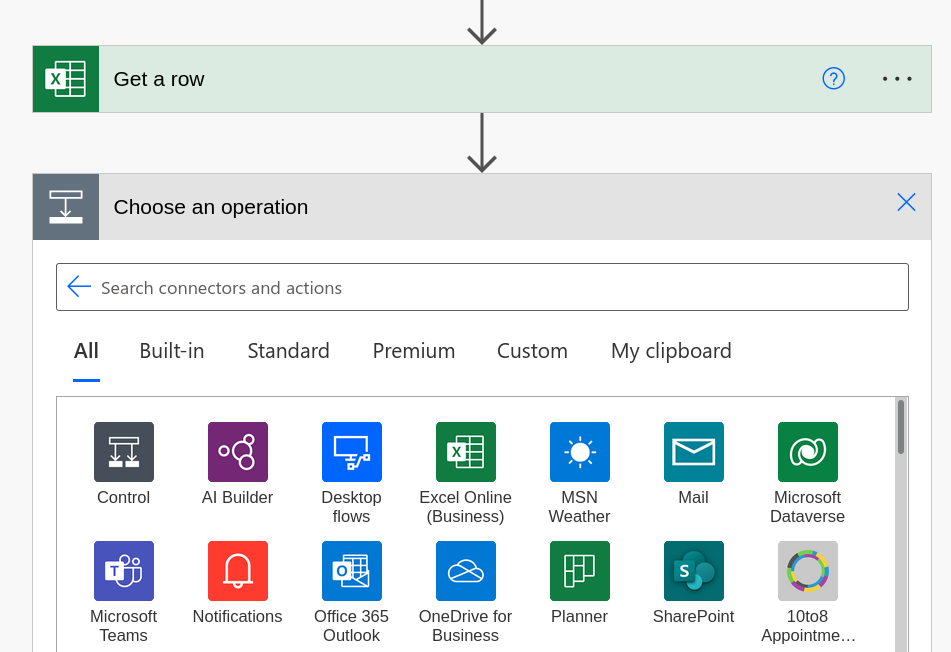
Now we will create an “action” that will extract a row from the excel spreadsheet we created before.
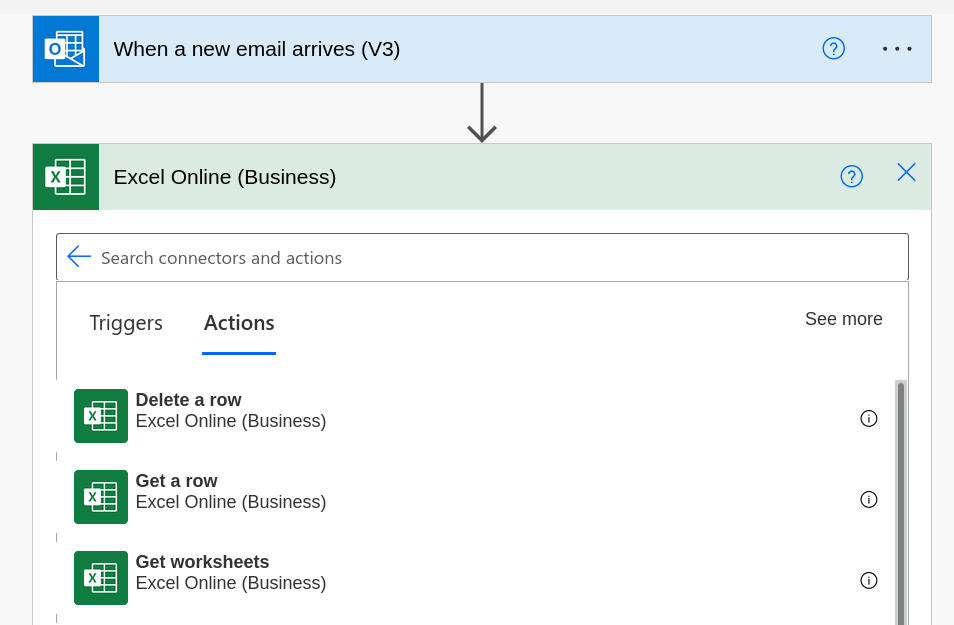
Choose Excel Online (Business) from the menu shown. Then in the following menu choose: “Get a row”.
In the “Get a row” dialogue, fill the parameters from the drop-down menus (the file name, the table, …). As shown in the figure. The “key value” field doesn’t come from a drop down, we need to write an expression down.
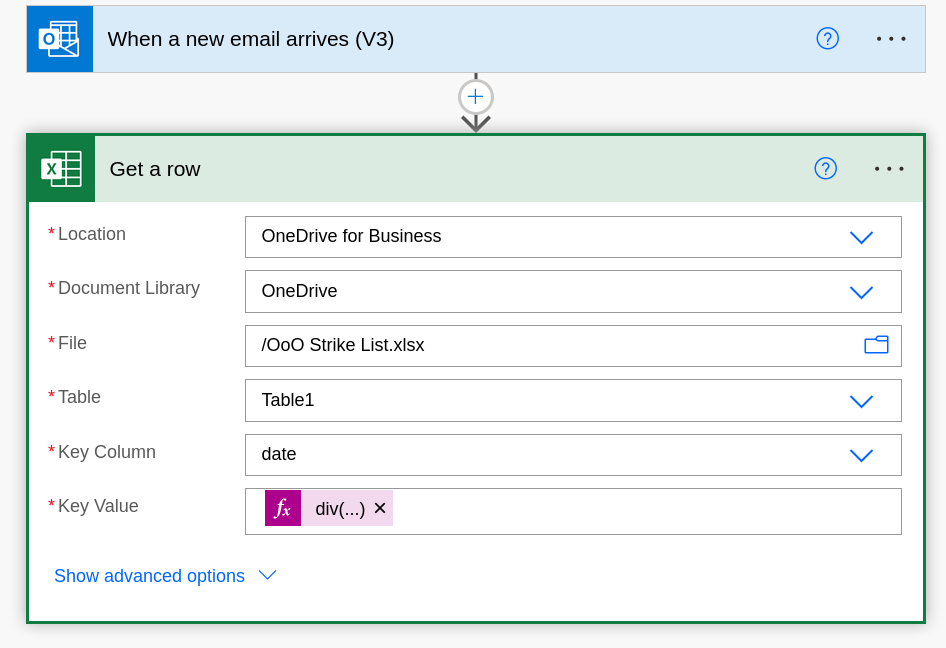
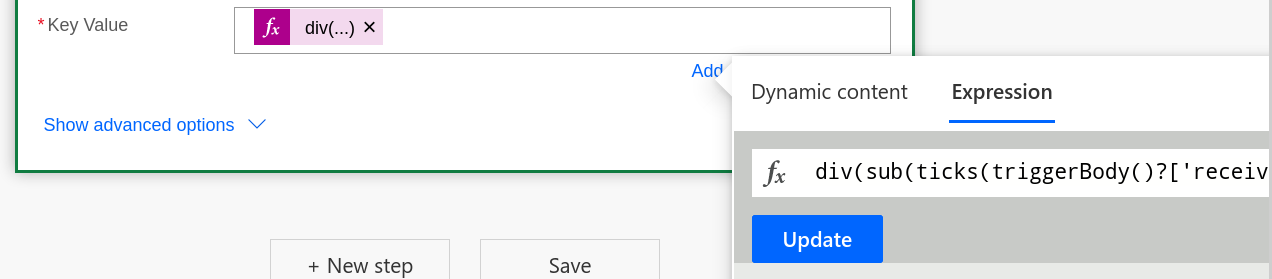
The expression to write is the following:
div(sub(ticks(triggerBody()?['receivedDateTime']), ticks('1899-12-30T00:00:00')), 864000000000)
This expression is converting the time from the email to the value that excel keeps dates in (essentially the number of days from December 30th, 1899).
With this, the “get a row” step will look into the file and the table we linked it too. Search the “key value” into the “key column”, and if it matches it will return that row from excel. We are using that now to compose our email to send back to the sender.
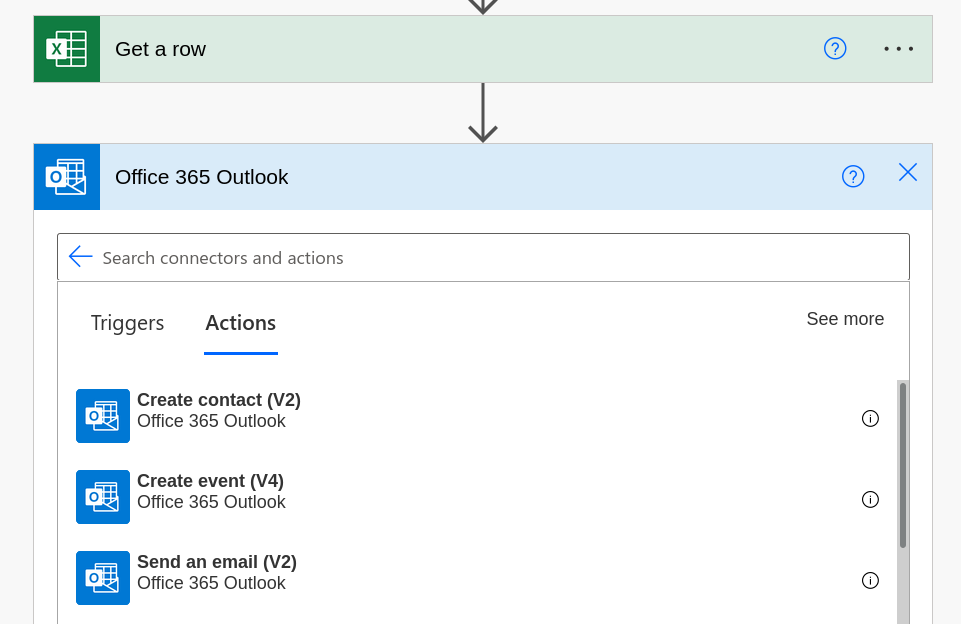
Let’s now create a new step. Here we choose “office 365 Outlook”, and “Send an email (V2)” as an action.
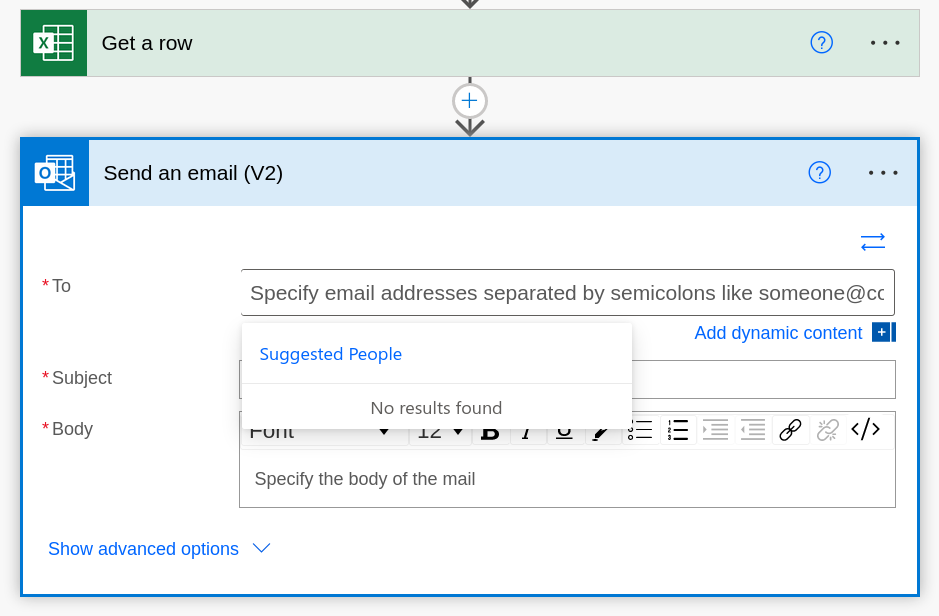
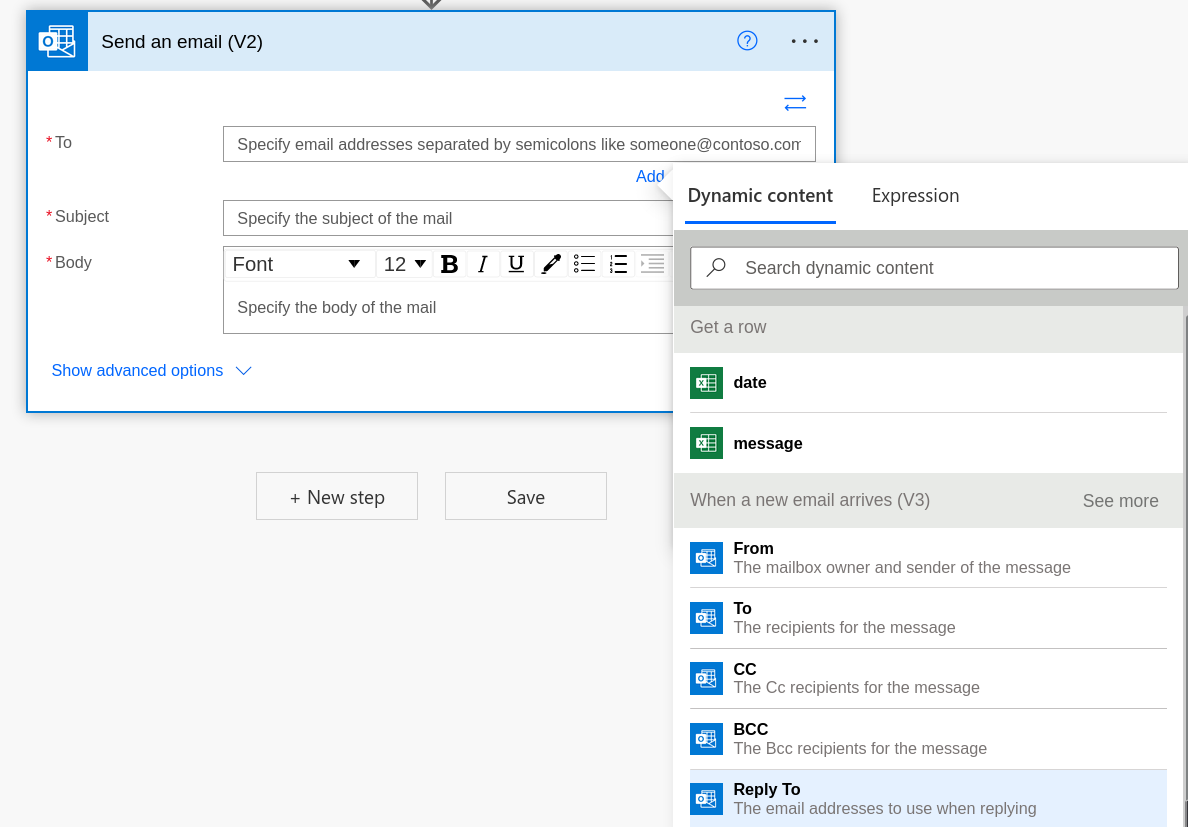
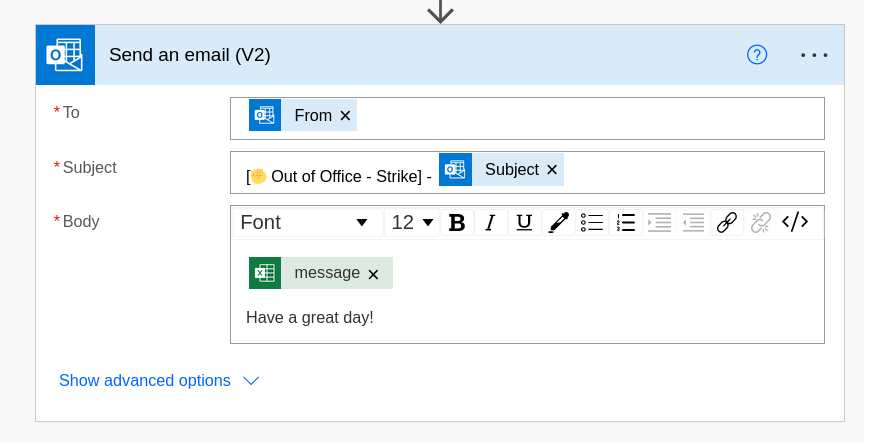
In the send-email dialogue we need to add “dynamic content”. There we can choose “From” field from the step below for the “To” field (i.e., send an email to sent it to us). For the subject we can also use the dynamic content to take the subject from the email we received and add any other decoration we want.
Finally, for the body, we will select the message column from the row we extracted in the step below. We can also add any other text in that box that will be common to all the days.
And that’s all! Click save, go back clicking the back arrow in the workflow top-bar (as shown below),
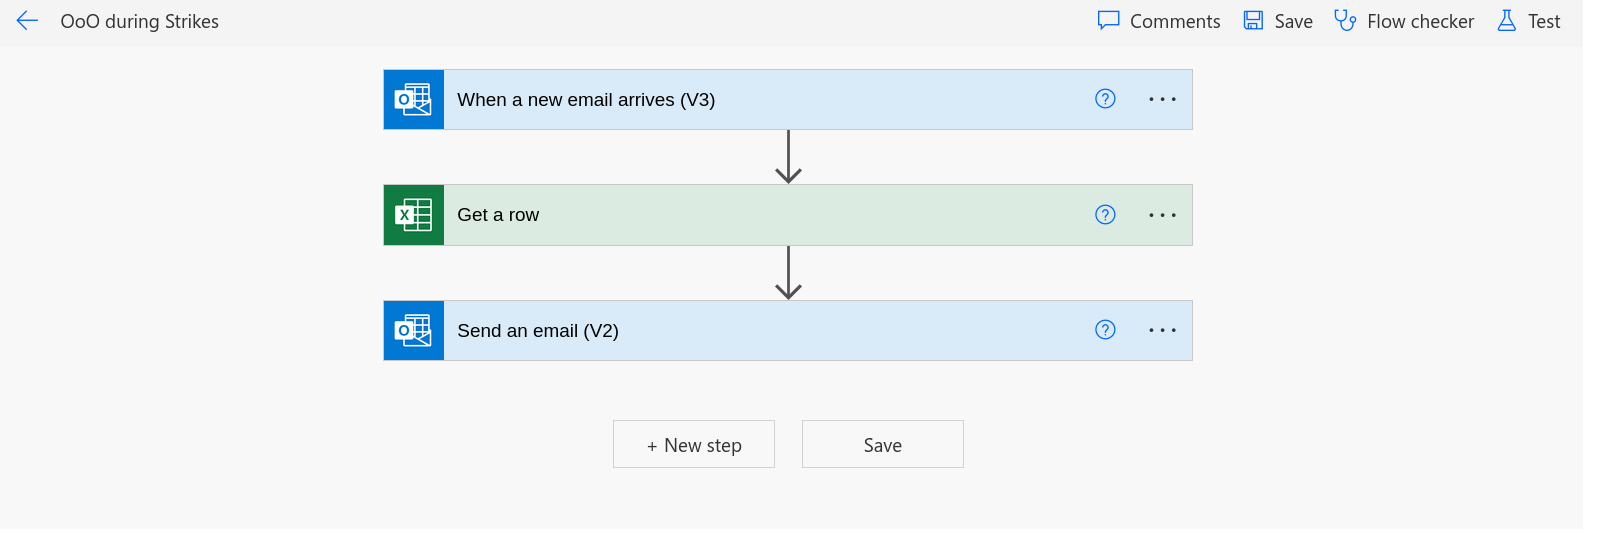
Make sure you turn it ON

And your email will be sending back emails to everyone who is writing to you.
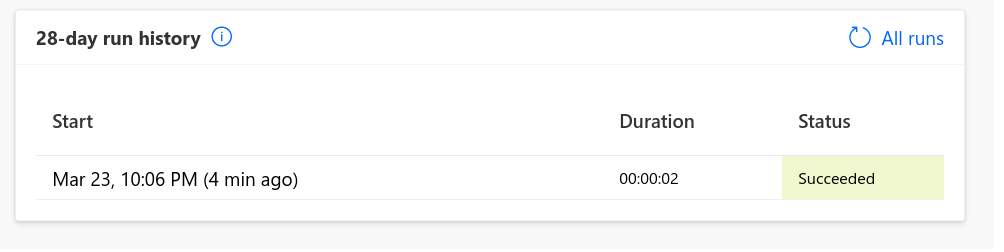
To test it, we send ourselves and email and wait for the response. You can also see whether the flow is working or failing at the bottom of the page.
Now that we’ve done this… how do you think we could only send replies to the people in our university? For that we would need to create an intermediate step that creates a condition and checks whether the email ends by our university domain. If does so, then we proceed send the email, otherwise, send another general email.
Update: Check the next post to see how to include that condition.
